
Easy DIY Halloween Blocks from 4×4 Scrap Wood
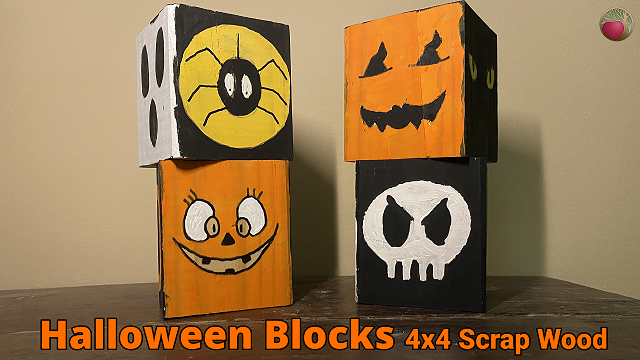
Get tips for fast and easy ways to create these adorable Halloween blocks from 4×4 posts.
This is a family fun project with tips to save on your paint supplies too.
Make Drawing Easy

15 Halloween Line Drawings
For scrap wood projects.
Sized specifically for 3.5” wood like 2x4s and 4x4s
More Resources
Everything shown in the video. Thank you for using my Amazon affiliate links to support the free and helpful info you get on Heartwood Art!!
- Wood filler
- Popsicle sticks
- Carbon paper and stylus
- Acrylic Craft Paints
- Craft Paint Brushes
- Wax Paper
- Sharpie – Industrial Super Permanent Ink
- Titebond III Blue
- Painting Triangles
Like my tips?
Subscribe to the HeartwoodArt YouTube channel
And to the HeartwoodArt Newsletter
Video
See More Halloween Decor
Get tips for making all kinds of easy and fun Halloween projects.
Today’s Project
See how to turn scrap 4×4 wood pieces into fun holiday Halloween cubes as a family-friendly craft.
Fill in Cracks
Most all 4x4s are center cut and have cracks in them.
When applying woodfiller, there is no need to add sawdust, as you’ll be painting them.
If you don’t have a putty knife, use:
- popsicle sticks
- paint sticks
- or even your finger to apply wood filler
Get Templates
If you are not confident in freehand drawing or painting on the blocks, like me, there’s an easy way to do it!!
You can download templates of the line drawings and use a tracing method with carbon paper to transfer the designs onto the wood.
Trace Templates on Wood
Tape the template to the block, place carbon paper (shiny side down) between the template and the wood, and trace over the design with a stylus or ballpoint pen.
Save on Paint Supplies
Use craft acrylic paint from the craft aisle, which is cheaper than artist acrylic paint. Same with the brushes
Wax paper works well as a disposable paint palette.
Add Fine Details to Painted Blocks
You can use a Sharpie or permanent marker to add fine details like spider legs or eyes after the paint has dried.
Don’t Paint Cube Bottoms
Glue adheres better to unpainted wood, so leave the bottom unpainted for mounting.
Mark Mounting Board
To get the glue to stick to your mounting board, draw lines where you want to mount the cubes and leave those areas unpainted.
Apply glue (such as Titebond 3) with a popsicle stick, and clamp or weigh down the cubes until the glue sets.
These are so cute! What a fun project to make with the kids.
Thank you!!!!