
Kreg Jig K4 and R3: How to, Cheat Sheet, and Tips
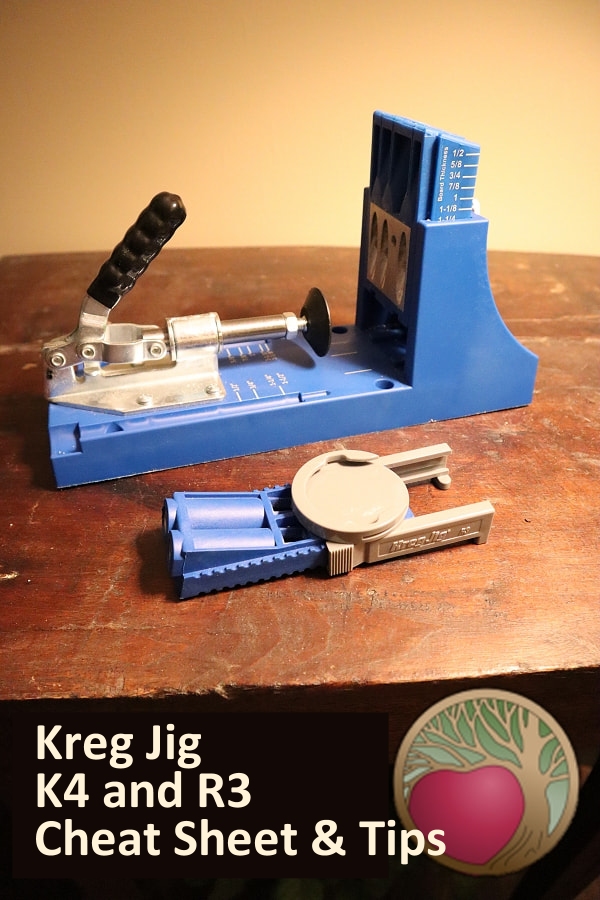
See how to setup and use both the Kreg Jig K4 and R3 for easily creating pocket holes.
They are quickly becoming my favorite shop tools.
And they make joining boards together so fast, easy, and strong.
Video Walkthrough
NOTE: The depth shown on the jigs is the official settings from Kreg. But see my chart for what actually works well.
Subscribe to the Heartwood Art YouTube Channel
for more helpful tips like this

Get Your Kreg On!!
See the Kreg Tools and Supplies I use and recommend.
Kreg Tools You’ll Want
Kreg Combo Kit – Get it and Save
Video Highlights and Pics
More info and pictures from the video, including the cheat sheet.
Which Kreg Jig Are You Using?
First, let’s determine which product you’re using.
There are multiple Kreg Jigs, and they are not all set up alike.
- Mini
- K3
- K4 (and K4M)
- K5
The K3 and K4 are set up alike, and are covered in this tutorial.
If you are using the Mini or K5, you will want to reference other tutorials, not this one.
Kreg Jig R3 Material Depth Guide Locations
The K3 material guide is located on the bottom.
Squeeze the gray grippers on the side.
Then slide to match the notch of the material thickness to the arrowed line.
This one is set to 1-½” for drilling into a 2×4.
Those sliders can be tough to move!!!
I find trying to do one at a time with my thumb is easiest.
Kreg Jig K4 Material Depth Guide Locations
The K4 material guide is on the side of the top part that slides up and down, and is held in place by a set screw.
Match the line to the edge of the assembly for your material thickness setting.
This one is set to 1-½” for drilling into a 2×4.
Note: From this angle it looks like I have the line just inside the assembly edge.
When looking from the top, it’s dead even.
Kreg Drill Bit and Collar
It’s super important to match your jig and drill bit to the right settings for your material thickness.
First, let’s identify the two parts of this that you’ll use to determine the correct collar position.
Collar – push the inside of the collar against the frame of the guide.
Bit length – match the end of the big part of the bit to the depth you need
R3 Drill Bit Guide
The drill bit guide is located on the inside of the box your K3 came in.
Then use the guide to set the inside of the collar to the correct depth.
Note that it has markings on both sides, so be sure to use the right one.
The most common settings are on the left.
And yes, the line between 1-¼” and 1-½” is for both.
The reason why is because you jump to a longer screw for the 1-½” depth.
K4 Drill Bit Guide
The K4 drill bit guide is on both sides of the assembly.
And as with the K3, the line between 1-¼” and 1-½” is for both.
The reason why is because you jump to a longer screw for the 1-½” depth.
Rule of Thumb Settings for Jig and Drill Bit Depth
When both materials to be joined are at least 3/4″ thick, the following general rules apply.
- Set the jig and the drill bit collar for the thickness of wood you are drilling into.
- Chose the screw length based on the thickness of the wood you are screwing into.
When you are joining thin wood, like a 1/2″ plywood or such, then the rules above do not hold.
Super Quick Drill Bit Collar Setup
For thin material, you can use this super quick trick.
Thanks to Jens Jension for this tip on this Kreg forum post!
Do not use this trick for material over 1-⅛” thick!
The reason why is because you jump to a much longer screw after that thickness.
Set the jig depth.
Then place a nickel under one of the hole outputs.
Drop in your bit and set your collar to that length.
Kreg Jig K4 and R3 Settings Chart
NOTE: The following chart assumes are you are drilling into the face of Material 1 and screwing into the face of Material 2. If you are doing face-to-end grain, such as a mitre connection, then you will need to seek other settings for that situation.
Where to Drill Holes on the R3
NOTE: As a general rule, drill with the grain, not across it, for the strongest joint.
Position the K3 so that the end of the gray sliders are snug against the end of the wood you are about to drill.
I use the Kreg clamp to hold the K3 in place.
There are 2 such Kreg clamps.
One has a far longer arms than the other, and is the one shown above.
The two flat ends of the clamp are different sizes.
The big one slide-fits into the K3.
As for position, the Kreg K3 jig is 1-½” wide.
The manual says to position the hole no closer than 9/16” from the edge of the material.
With the edge of the gray slider flush with the edge of the wood, that puts the center of the nearest drill hole 9/16” from the edge of the wood.
If you are working on a narrow piece of stock, you can drill holes side-by-side without moving the jig.
So, for a 1” board (where the actual is ¾”), place the jig in the dead center and drill both holes.
For a 2” board (where the actual is 1-½”), the widest you can go would be to place the gray slider flush on one side, as shown above, and use the drill hole on that same side. Then repeat for the other side.
Of course, you can always move more toward the center for each hole, if you like, too.
For panels, you don’t want to go more than 6” between holes.
Where to Drill Holes on the K4
NOTE: As a general rule, drill with the grain, not across it, for the strongest joint.
The holes you use depend on the width of your material.
For a 1×2 board, mount it center between B and C and use those holes.
For a 2×4, mount it center in the jig. Then use holes A and C.
For wider stock or down the side of a panel, mark a line on the stock where you want the center of your pocket hole. And then line it up on the jig with the hole you want to use for drilling.
How to Drill
This may sound silly, but this is how the Kreg manual says to do it, mainly for safety and to ensure you do not damage the bit or jig.
With the drill still, place the bit fully into the hole until the tip touches the material.
And then back it up ¼”.
Then turn on the drill full speed and plunge into the material.
Some folks find that going about halfway, then pulling the bit mostly out to allow shavings to be cleared, and then drilling the rest of the way, seems to work best for them.
Secure the Jig!!!!
For the K3, hold on to the clamp!!!!
I put some downward pressure on the jig, near the clamp, to ensure it stays in place.
For the K4, I use the shorter armed clamp (like the one pictured above on the K3) to secure it to my workbench, and just rotate it to the side, so it’s not sticking out and in my way when I belly up to the jig.
Since you will be drilling straight down, it’s likely the jig won’t move.
Clamping Material on the K4
Ensure that your material is properly secured on the K4 before you start drilling into it.
To adjust, loosen the lock nut, and turn the rubber foot to the desired length.
When you bring the clamp handle down, you should feel it “lock” into position.
It should be just enough pressure to hold the material securely.
Once set, then tighten the lock nut against the clamp arm to hold the setting.
Storing Your Kreg Accessories
The K3 comes with a case, and honestly, that’s the best place to keep everything.
The K4 has some storage under the unit for the bit and wrench.
But, that’s not exactly handy if you keep your jig clamped down.
I find a square plastic tub works perfectly.
It’s long enough for the drill bits when placed diagonally.
And the tub fits perfectly in my mitres saw station cubby holes too!
See: How I built this easy, DIY mitre saw station.
Happy Pocket Hole Making!
You should be all set to make your pocket holes with your Kreg K3 and K4!
Be sure to see some of the things I’ve made with my Kreg Jigs, including:
I have the kreg jig that has two holes side by side .it has no third hole .I’ve been moving it every time I’m making end tables usiñg ,2x4s mostly and some I use 2×3 if it’s smaller by moving it over from the edge like 3\8 of an inch then I’ll do same on other side of the day 2×4 which I’m using two 21/2″ screws to join them with .Only problem is its slower cause I have to reclamp it .Can’t I just use both holes instead of all that reclamping?
Or, are they too close?I think you stated ,11/2?they should be? I just want to make sure their not too close also would the 11/2″ screws be just as good ?
I drill holes side by side like that when going into a 2×2 or 1×2 – so as far as the wood is concerned, it’s fine.
However, on something wider, I like to have holes further apart to help square the piece when attaching.
I can’t move the clamp handle on my K3 system. I’ve never used it before but have had it for about 3 years. Any suggestions?
I have not heard of that issue, but there are Kreg Facebook groups and such where you can ask about. I’m betting you’re not the only one who has run into it.
Jack, this exact thing just happened to me today. I pulled out my Kreg K2000 kit after several years of not using it and the clamp was very stiff. Not completely frozen, but I could barely move it, and only with a lot of force. I put a few drops of machine oil on the piston and pulled it through then put a couple more drops on the other end and went back and forth.. After a couple of minutes it was sliding back and forth very smoothly just like when it was new. If you can move yours even a little, this might work for you. Good luck.
Joe
Thank you so much for this! My jig has a line for 1 1/4″ but not 1 1/2″, and I thought it might mean they share the line, but it wasn’t clear. I appreciate you!
Yes, the 1-1/4 and the 1-1/2 share the line. And yes, it confuses everybody!!